
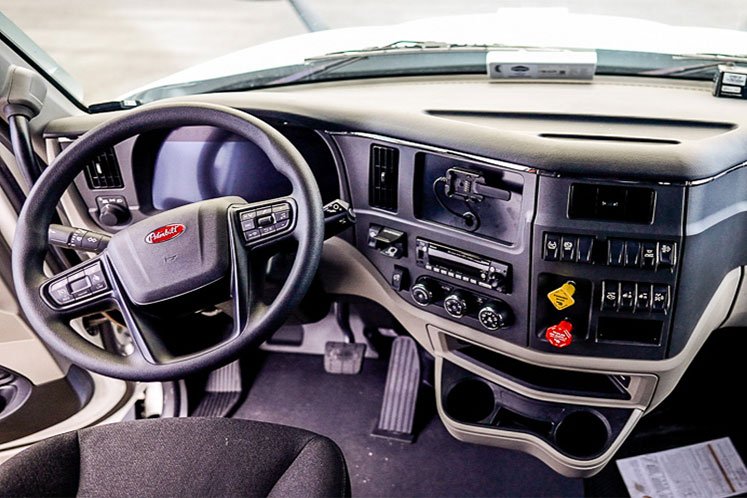
The in-cab air-brake check tests whether you can operate the system safely and recognize an unsafe response. It is not a national recitation contest, and there is no single script guaranteed to pass in every state.
Use the sequence below to learn what each check proves. Then match the order, pressure limits, vehicle controls, and examiner instructions to your current state CDL manual and the vehicle you will use for testing.
Start with the written-test gap. Take the Air Brakes diagnostic to see which concepts need review before you rehearse the vehicle procedure.
For each demonstration, practice four short statements: what you are checking, how the vehicle is safely configured, what you observed, and whether that result is within the current state-manual limit.
Step 0: Secure the vehicle
Before you even look at the dashboard, you must secure the vehicle. Follow the wheel-chock or vehicle-securement procedure required by your state and test site before releasing any brake.
- Action: Grab your wheel chocks, step out of the truck, and place them securely in front of and behind one of the drive tires.
- Action: Climb back in. Fasten your seatbelt.
- The Script: “My seatbelt is securely mounted, not cut or frayed, and latches properly. My wheels are chocked outside.”
Step 1: Safe Start & Build Air
You need full air tanks to start the test.
- Action: Make sure the transmission is in Neutral. Ensure both the Yellow (Tractor) and Red (Trailer) brake valves are PULLED OUT (set). Start the engine.
- Practice statement: “I am performing a safe start and building air pressure while watching both gauges and warning indicators.” Use the applicable governor range from the state manual and test vehicle.
- Action: Gently press the accelerator to about 1,000 RPMs to build air faster. Wait until you hear the loud Pshhh (the governor sneezing).
- The Script: “The governor has cut out. My primary and secondary air tanks are full.”
The L.A.B. Sequence (The Core Test)
L.A.B. stands for Leaks, Alarm, Buttons. It is a useful memory aid, but your state may administer or name these checks differently.
Configure the engine and ignition exactly as your current state procedure requires so the gauges and warning devices can be observed.
- Action: Turn the engine OFF. Turn the key back to the ON position. Push BOTH the Yellow and Red knobs IN (Release brakes). Wait for the air needles to settle.
L is for Leaks (The Applied Leakage Test)
- Action: Press the foot brake pedal firmly and hold it down. DO NOT move your foot.
- Practice statement: “I am applying the service brake for the required leakage check. I will compare the actual pressure change with my state’s limit for this vehicle.”
- Action: Time the interval required by the state procedure; do not guess.
- Practice statement: “The timed interval is complete. The system lost ___ PSI, which is [within/not within] the applicable limit.”
A is for Alarm (Low Air Warning)
- Action: Start pumping (fanning) the foot brake rapidly to release air from the tanks. Point to your air gauges.
- Practice statement: “I am reducing pressure to test the low-air warning. I will call out the actual reading and compare it with the state-manual threshold.”
- Action: Keep pumping until the loud buzzer sounds and the red light illuminates on the dash.
- The Script: “The low air warning light and buzzer have activated at [Read the exact number on the gauge, e.g., 65 PSI].”
B is for Buttons (Spring Brakes Pop-Out)
- Action: Continue pumping the foot brake rapidly. Keep your eyes on the Yellow and Red knobs.
- Practice statement: “I will continue according to the state procedure and identify the pressure at which the required parking or protection control activates.”
- Action: Continue only until the required control or controls activate; note the actual gauge reading.
- Practice statement: “The required control activated at ___ PSI. I will compare that reading with the current state-manual range.”
Step 3: The Tug Tests (Proving the Brakes Hold)
You have proven the air system works. Now you must prove the mechanical brake pads actually hold the truck.
- Action: Step outside, remove the wheel chocks, and climb back in. Perform a Safe Start (Engine ON) and build your air pressure back up to 120 PSI.
1. Tractor Parking Brake Test
- Action: Push the RED knob IN (releasing trailer). Leave the YELLOW knob OUT (holding the tractor). Put the truck in 1st gear (or Drive).
- The Script: “I am testing the tractor parking brake.”
- Action: Gently ease off the clutch/press the gas. The truck should tug but not move.
- The Script: “The tractor brake holds.”
2. Trailer Emergency Brake Test
- Action: Pull the RED knob OUT (holding the trailer). Push the YELLOW knob IN (releasing the tractor).
- The Script: “I am testing the trailer emergency brake.”
- Action: Gently ease off the clutch. The truck should tug against the trailer but not move.
- The Script: “The trailer brake holds.”
3. Service Brake Test (The Roll Test)
- Action: Push BOTH the Yellow and Red knobs IN (all brakes released).
- The Script: “I am testing the service brake. I will pull forward at 5 MPH and apply the foot pedal.”
- Action: Roll forward only as instructed, keep both hands ready to maintain steering control, and apply the service brake.
- The Script: “The truck stopped smoothly. It did not pull to the left or the right, which indicates my brakes are properly adjusted and I have no steering issues. This concludes my air brake inspection.”
Pro Tips for the Examiner’s Clipboard
Having a printed cdl air brake test cheat sheet is great for practice, but how you act matters just as much as what you say.
- Identify the component: Point to the correct gauge or control when the examiner’s procedure permits it, so your explanation is unambiguous.
- Speak Loudly: Truck cabs are noisy, especially if a reefer unit is running next to you. Project your voice.
- Don’t Rush: The biggest enemy of the cdl in-cab air brake test script is adrenaline. If you stumble on a word, stop, take a breath, and correct yourself. The examiner is not timing you to finish quickly; they are watching to see if you are safe.
Use this page to learn the purpose of each check, then rehearse on the same vehicle type you will test in under qualified supervision. Never operate unfamiliar air-brake controls in a personal car or unsecured commercial vehicle.
Take the Air Brakes diagnostic, use missed questions to choose the next topic to review, and then repeat the vehicle demonstration. The complete 1,500+ question library is available as a one-time $19.99 upgrade if you need continued practice.
For the governing skills standard, review 49 CFR §383.113. For the administered procedure and scoring, use your state’s current CDL manual and examiner instructions.